Shopify
Manual Installation
-
Log in to your Shopware admin panel
-
Install the following plugin in your shop, by clicking the install button on the following page: https://store.shopware.com/en/dne5719820551438m/custom-javascript-css-manager-for-shopware-6.html (opens in a new tab)
-
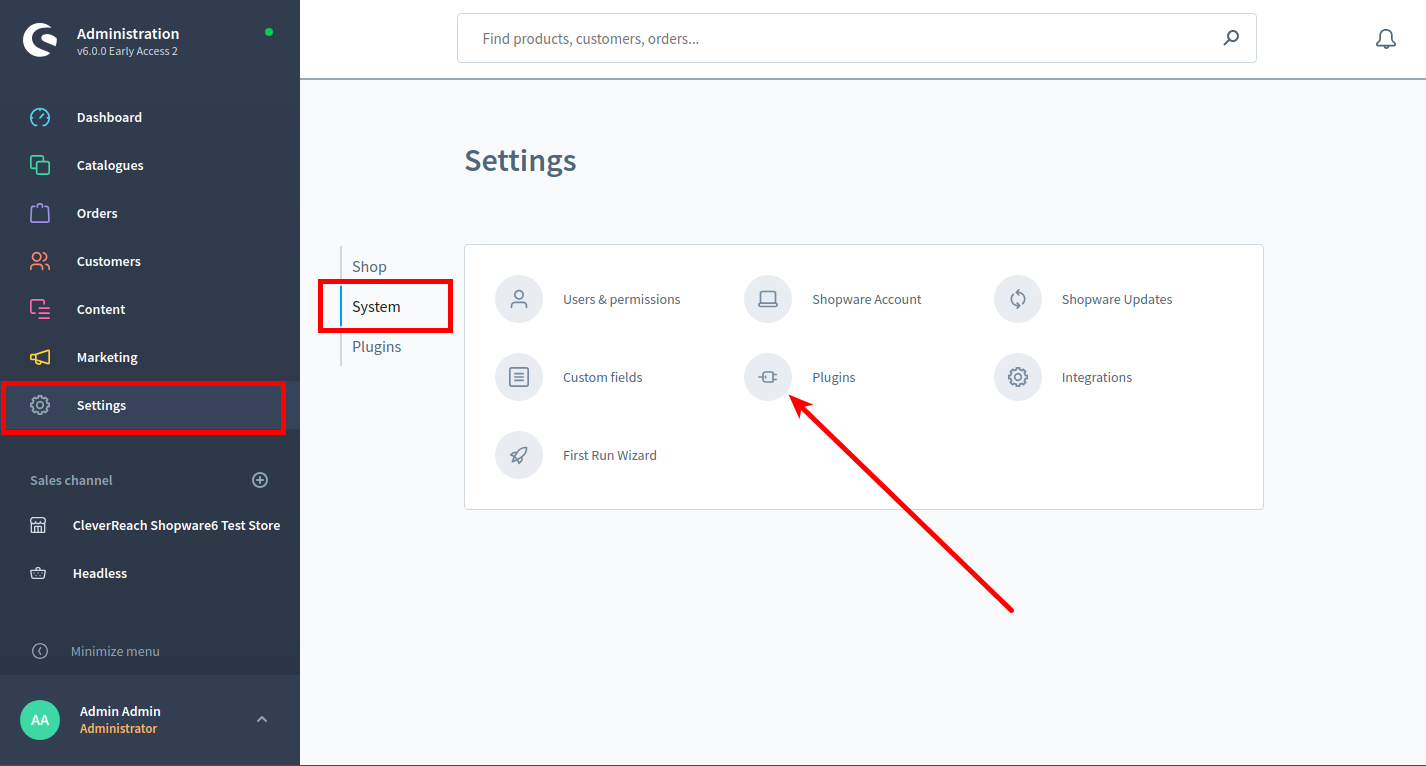
Select “Settings / System” and click on the “Plugin” icon.

-
Locate your purchased/downloaded plugin in the list
-
After successful installation, click the switch button to activate the plugin
-
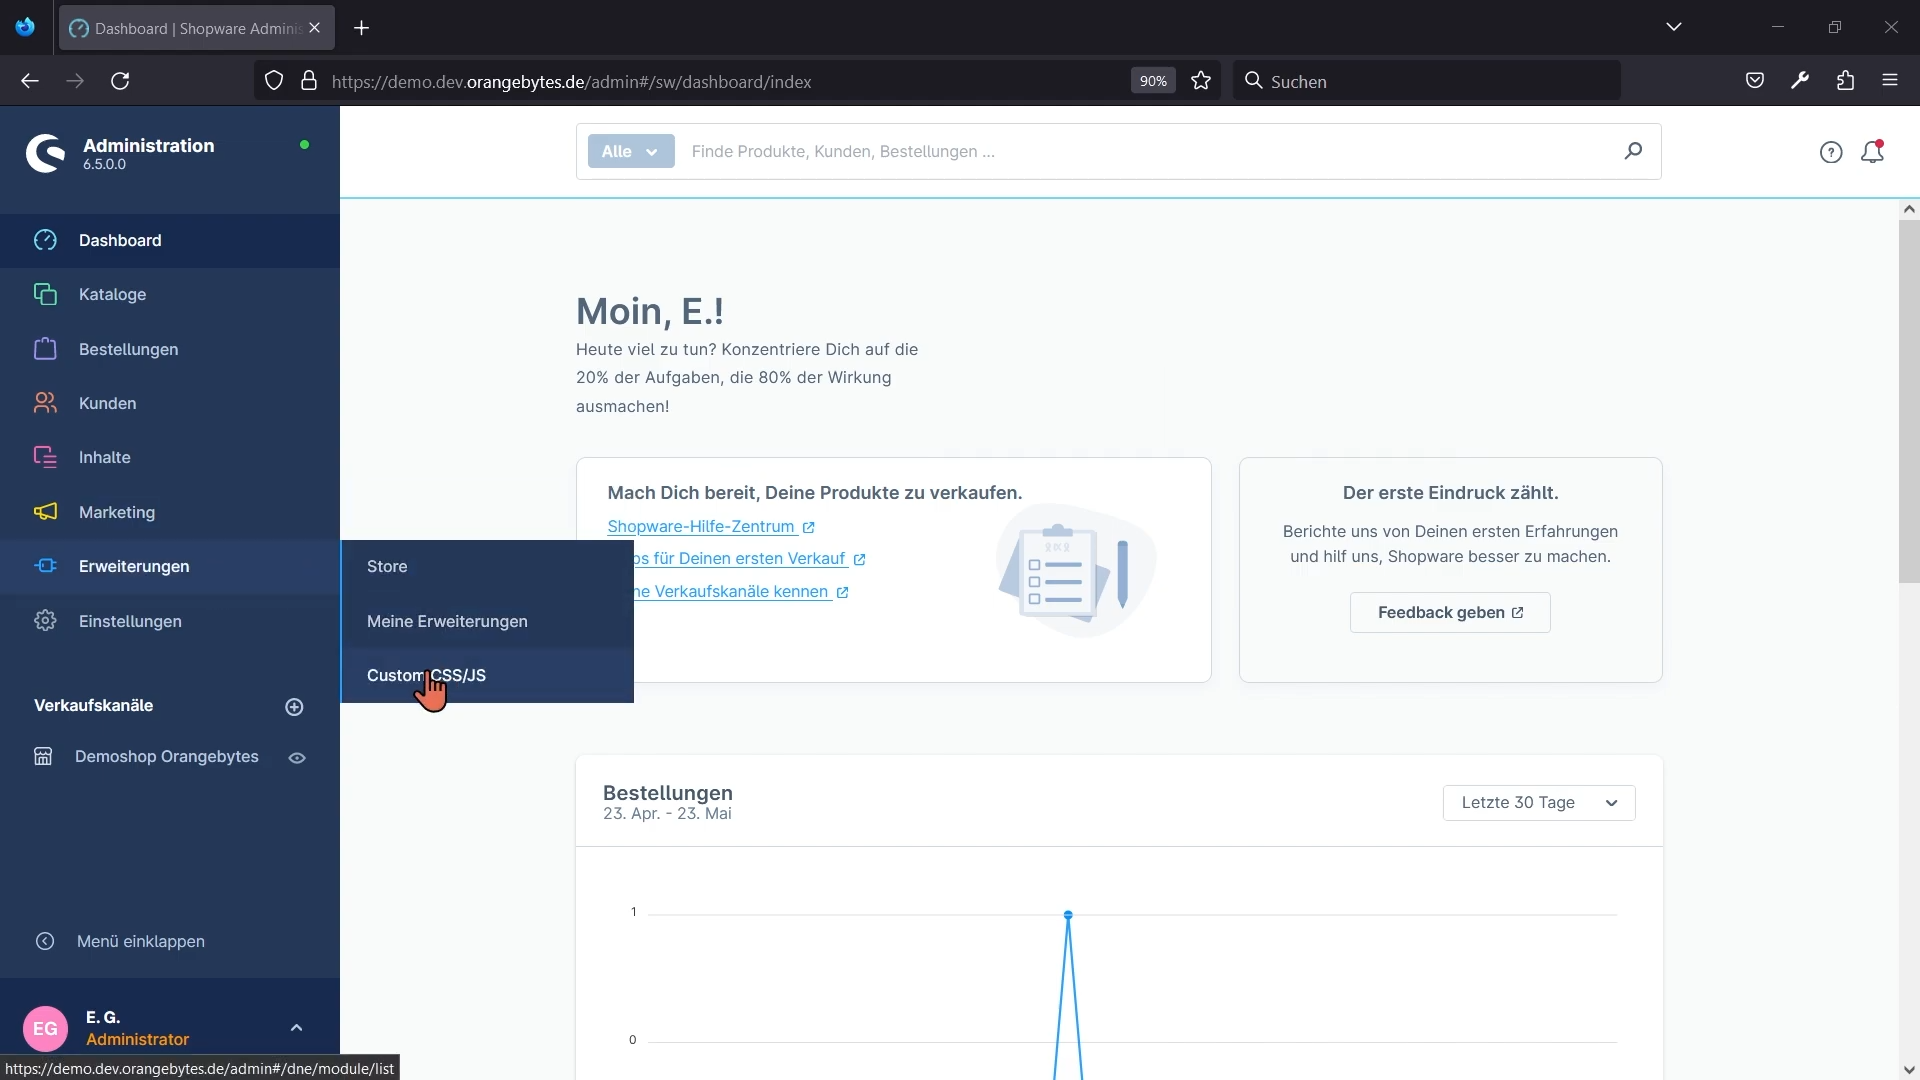
Go to Extensions -> Custom CSS/JS

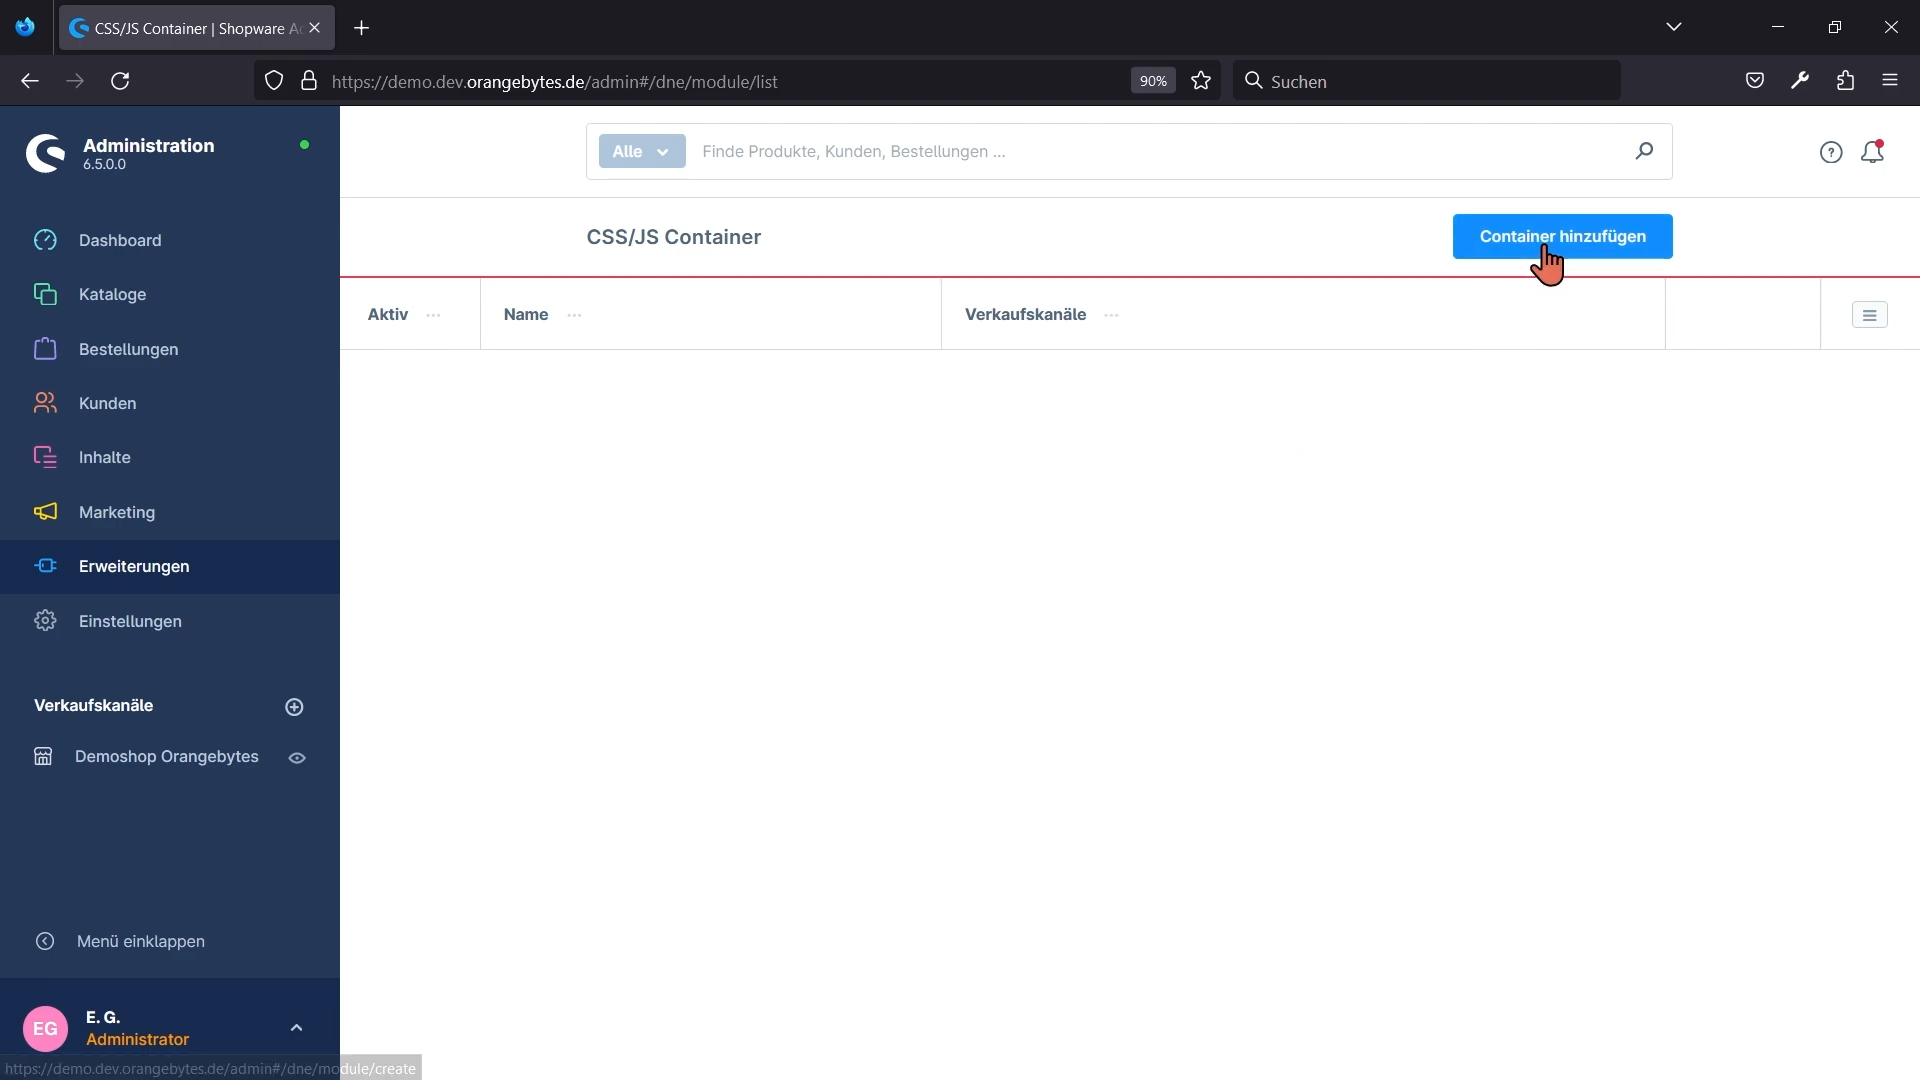
- Click on "Add Cointainer" / "Container hinzufügen"

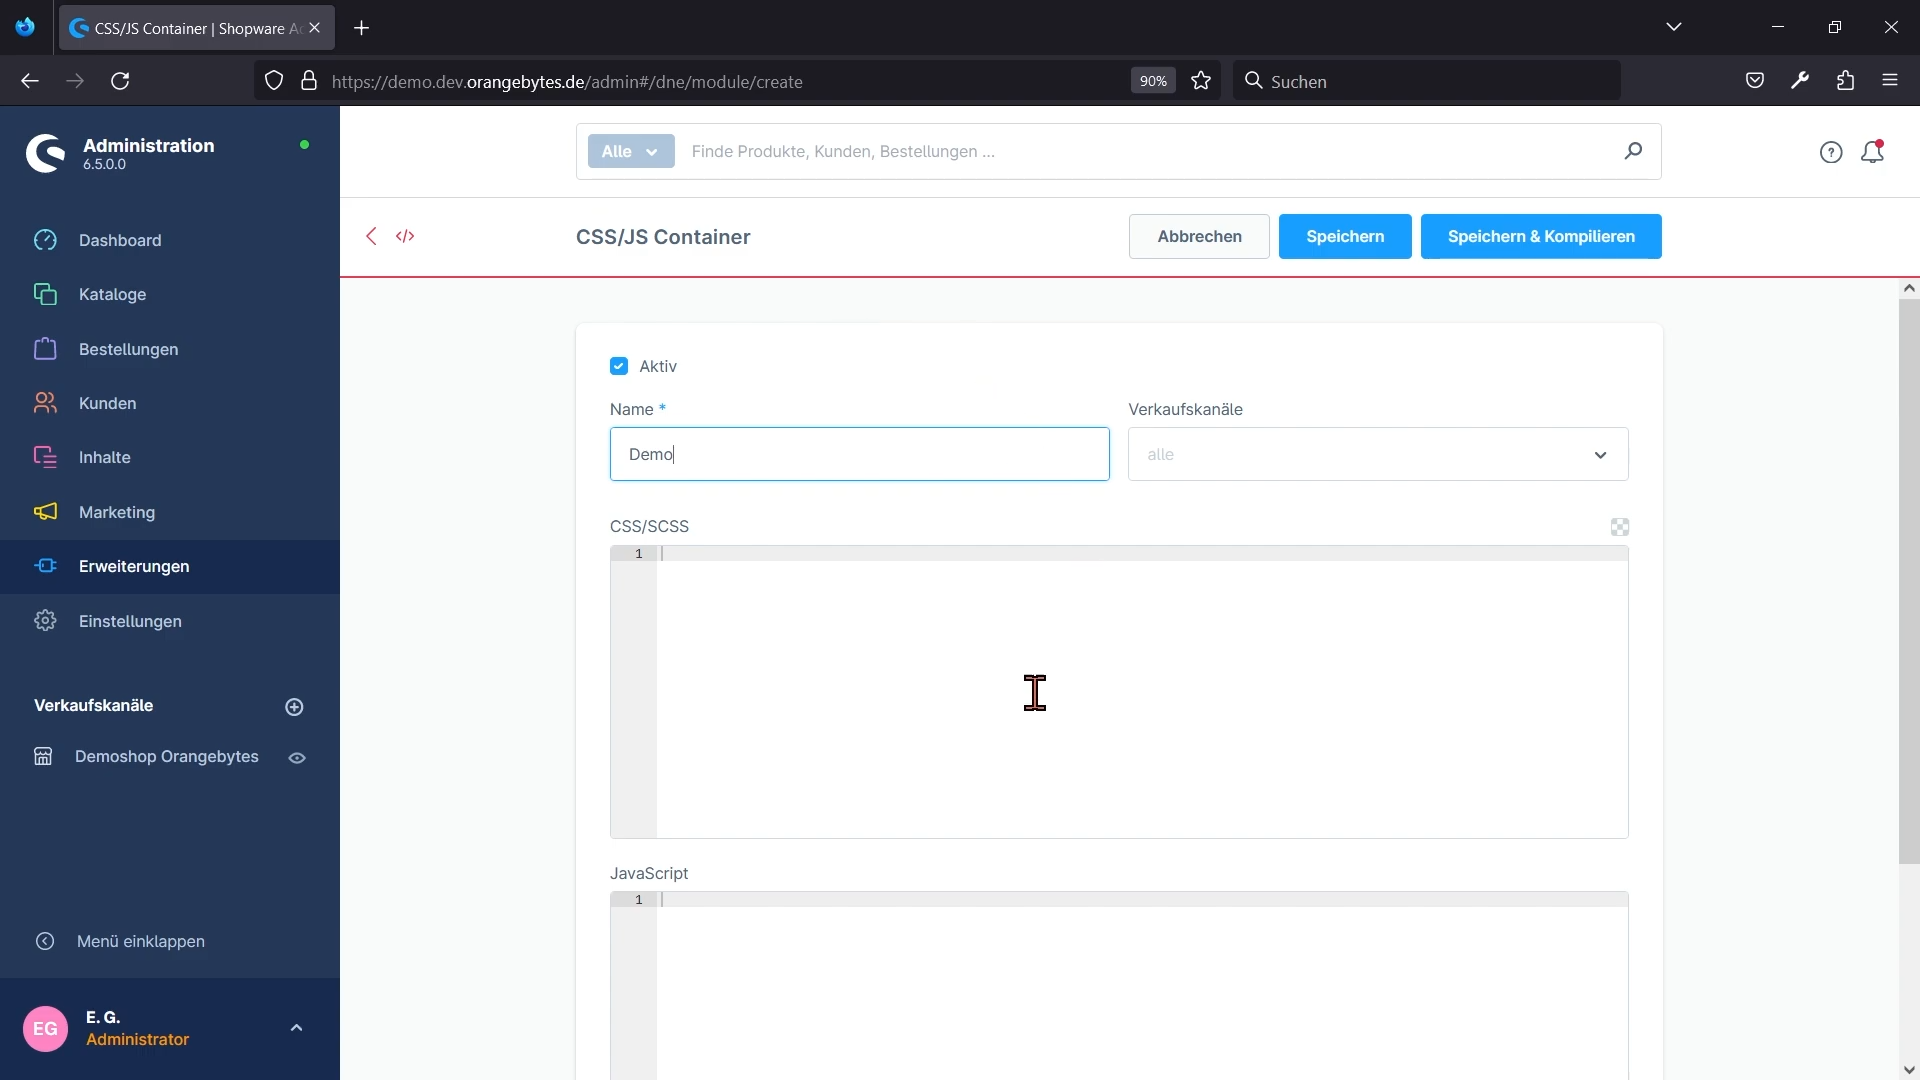
- Set "mySHOEFITTER" in the "Name" field and select sales channel.

- Now paste the following javascript code in the "Javascript" field:
mysf.js
document.addEventListener('DOMContentLoaded', function() {
  const script = document.createElement('script');
  script.src = 'https://js.myshoefitter.com/v1/script.js';
  script.async = true;

  script.onload = function() {
    myshoefitter.init({
      shopSystem: 'shopware'
    });
  };

  script.onerror = function() {
    console.error('Failed to load mySHOEFITTER script');
  };

  document.head.appendChild(script);
});- Click the "Save and Compile"-Button
Now you should see the button on your product page. If not, please notify us, so a technican of our team can take a look.
Installation Service
If you having trouble adding the script by yourself, we would love to help you.
Please send login credentials to your contact person as mySHOEFITTER.